Advertisement

OPINIONS
How to mint your first Etheruem NFT
A follow-up guide on minting directly from a projects website/contract
This guide is a follow-up from my first guide for buying NFTs on Opensea that covers setting up a Metamask and Opensea account, if you have not done so, check it out here. This article will be longer as there are many factors that come into play when minting a project when its sale goes live.
The first step is adjusting your Metamask gas settings. Gas refers to the cost necessary to perform a transaction on the network.
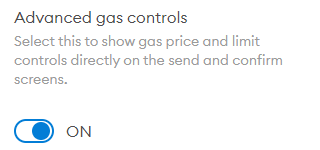
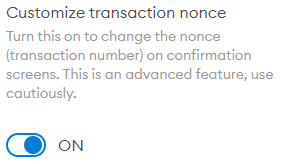
In your Metamask, head to Settings - Advanced - Turn on Advanced Gas controls and Customise transaction nonce.
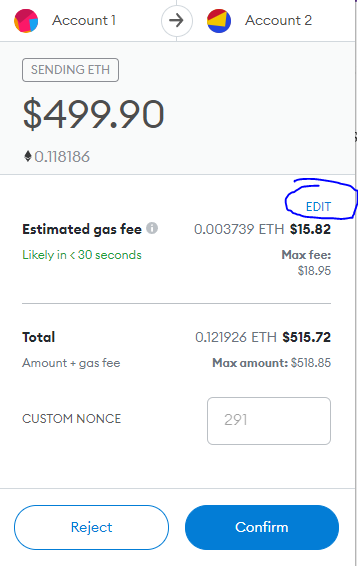
Turning on advanced gas controls allows you to better adjust your Gas Limit, Max Priority Fee, and Max Fee for each transaction you send, you can access advanced gas controls by going to the “Edit” button in your Metamask Pop-up as seen below

Before I explain how you adjust each factor, here is a quick explanation for what each one means.

GWEI: Gwei is a small unit of the Ethereum network’s ETH
GWEI/ETH Conversion: 1 Gwei = 0.000000001 ETH
Gas Price(Transaction Fee): Gas limit * (Base fee + Max Priority Fee)
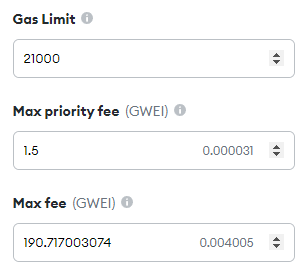
Gas Limit: “Gas limit” refers to the maximum amount of gas that you’re willing to spend on a particular transaction, the more complex the commands you want to execute, the more gas you have to pay. A standard ETH transfer requires a gas limit of 21,000 units of gas. DO NOT CHANGE THIS. Metamask will do the calculations for you and adjust them accordingly, incorrect gas limits will lead to failed transactions and loss of your gas fee.
Max Priority Fee (GWEI): The max priority fee, also referred to as the “miner tip”, goes to the miner or validator, and incentivizes them to prioritize your transaction
Max Fee (GWEI): The max fee is the maximum amount you are willing to pay for your transaction for both Base Fee and Max Priority Fee.
Do note that the price that Metamask displays are just an estimate, it may be higher or lower than shown. If you edit a higher gas fee, you will not be charged the amount shown, you can check your actual gas fee after the transaction has been completed.
The reason we need to learn how to adjust gas is that we want our transaction to be picked up and confirmed by the Ethereum network before a project is sold out. If a project is sold out before your transaction is approved, it will fail and you will lose your gas fee.
There are many sites that you can use to track what are the current gas prices on the Ethereum blockchain. Here are a few websites you can use
BlockNative
Etherchain
Etherscan
TxStreet (Easier Visualisation)
The goal is to edit your Max priority fee and Max fee above what is shown on the websites to incentivise miners to pick up your transaction.
Now that you have an understanding of how Gas Fees work, it's time to actually mint an NFT.
There are two ways of going about this, either directly through the project's smart contract, or website.
When minting, it is recommended to have both open on different tabs, this ensures that you are able to mint from one source if the other is not live. There are many situations where a project’s website is dead because the servers simply are not able to handle the influx of people on the site, while the contract is live and some people are able to buy their NFTs there.
For this article, I will be using an example project that is live and did not finish minting as of writing time. THIS IS NOT FINANCIAL ADVICE NOR AM I ACTUALLY MINTING. PLEASE DYOR BEFORE MINTING ANYTHING.
Project: Pigeon Gang
Website: https://pigeongang.com/
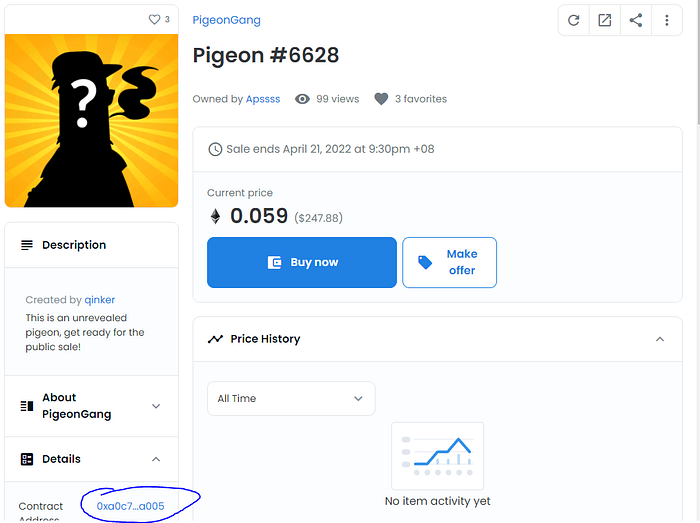
Contract : https://etherscan.io/address/0xa0c7637c711510fe7fe885054f84c1e7451aa005
Opensea: https://opensea.io/collection/pigeongang
For most projects, these links can be found in their discords under an official links channel, you could also ask any mod or team member to direct you. If the project has already had its presale and items are listed on Opensea, here is another way to find the contract.
1) Head to OFFICIAL Opensea collection
2) Click into a listing
3) Under Details - Contract Address

Minting from Website


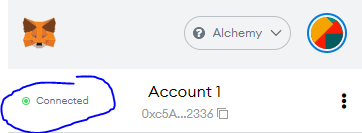
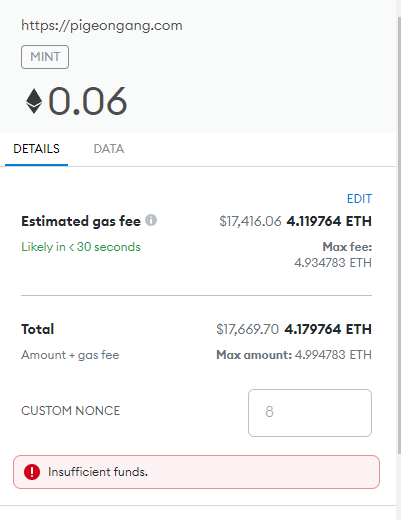
The first step is to connect your Metamask wallet using the connect button on the site, different projects have their connect button on different locations. After you are connected, your Metamask popup should look like below.

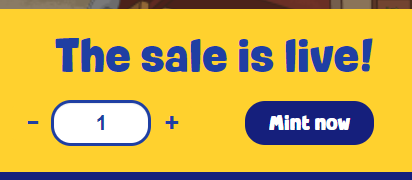
The next step would be to select the number of NFTs you wish to mint and press the mint button.

This is how the Metamask pop-up will look to mint 1 NFT, ensure that the function is “MINT” and not “SENDING ETH” if it shows “SENDING ETH” it is likely a scam project. Click on Confirm and adjust the gas accordingly like mentioned above and wait for the transaction to be approved.
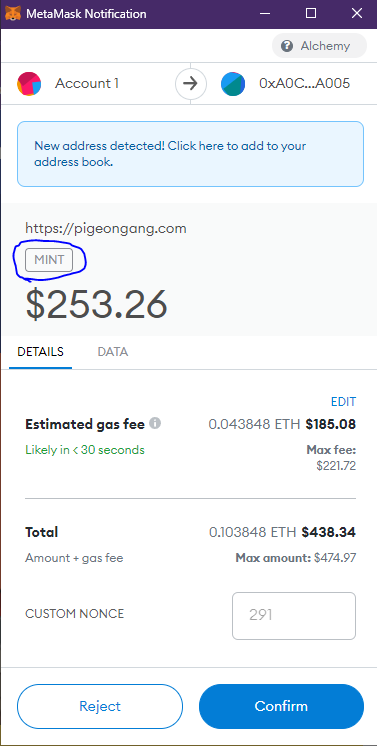

If Metamask shows an absurd amount of gas, either the Mint is not live, or you do not have sufficient funds.

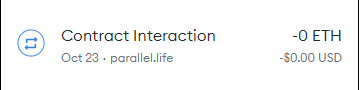
To check on your transaction, hit the activities tab in your Metamask extension


The image below shows an example of a successful transaction with the blue logo.

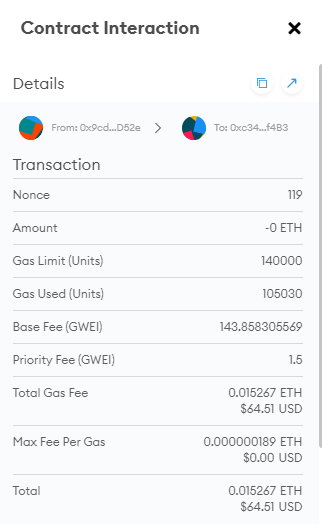
Click into the transaction to view the transaction details. As you can see, this transaction used the following
Base Fee (GWEI): 148
Priority Fee (GWEI) : 1.5
And the total fee in USD was $64.51.

The NFT you minted will show up in your Opensea profile’s collection momentarily.
Minting from Contract
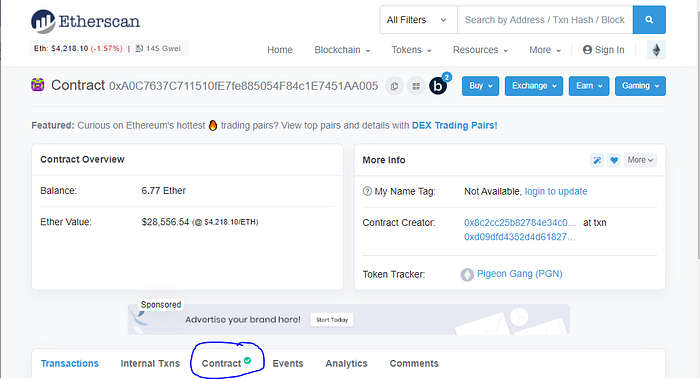
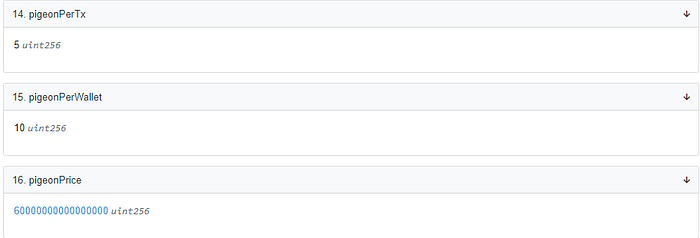
Minting from the contract should be done primarily for all drops because there is a higher risk of the website crashing, some projects do not allow for minting through the contract. A project’s contract provides many useful information, the first being a project’s mint price, maximum mints per transaction, and maximum NFTs per wallet. To view this, head over to contract - Read Contract, and find the info you want to see.
Price - 16.pigeonPrice
Max mints per transaction -14.pigeonPerTx
Max NFTs per wallet - 15.pigeonPerWallet
There are also other ways to use a project's smart contract and Etherscan which I will cover in the future.


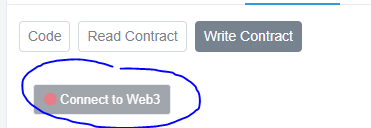
After you have the information you need, head over to “Write Contract” to mint your NFT.


After clicking on “Write Contract”, connect your wallet.

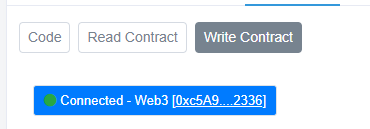
This is how it looks after you are successfully connected.

You can now find the mint function under the contract, for this project, it is under function 8 which says “mint”. There are projects who rename their mint functions to names such as “adopt” or “buy”, you will be able to discern them after seeing how it looks a few times.
Using the info we saw from the contract data, we know that the mint price is 0.6 ETH for 1, fill in the details correctly according to the contract. Ensure there are no typos such as spacebars or wrong numbers, Metamask will either not pop up or show absurd gas. Click on “Write” and adjust gas accordingly, and you are done.


Congratulations on minting your first NFT! I hope this guide has been helpful and easy to follow, there are still many more aspects to NFTs that still has to be covered for you to get a full understanding of how the NFT space works and the many other loopholes (hehe) in the space for you to earn money! Let me know if there are any other topics I should cover. Thanks for reading.
Comments
660
0
ABOUT ME
20 | Crypto/Defi/NFT degen | I invest in narratives | I write sometimes
660
0
Advertisement
No comments yet.
Be the first to share your thoughts!